
To make a sale, first access the POS menu.
Selecting a Customer
Once you have logged in you will arrive at the select/Add/edit Customers window. Scroll through to locate the customer you are searching for or select the **Thank You** customer; this is your default customer.
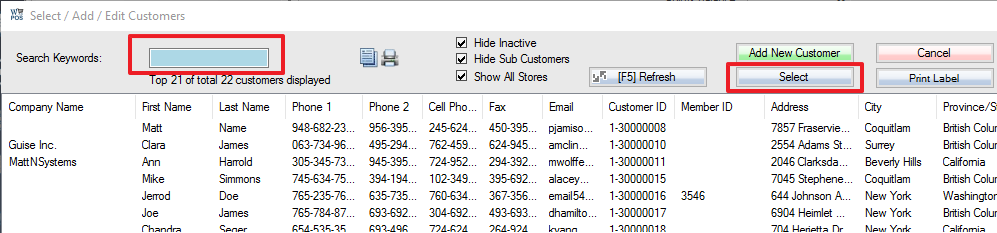
1.To search for a customer, key in a keyword into the Input Keywords field at the top of the screen, the matching customer(s) will then be displayed.
2. Once you have located the customer you are searching for, either double-click or highlight the customer and click Select button situated on the top right of the screen to select the customer.
More details here.
Inserting SKUs
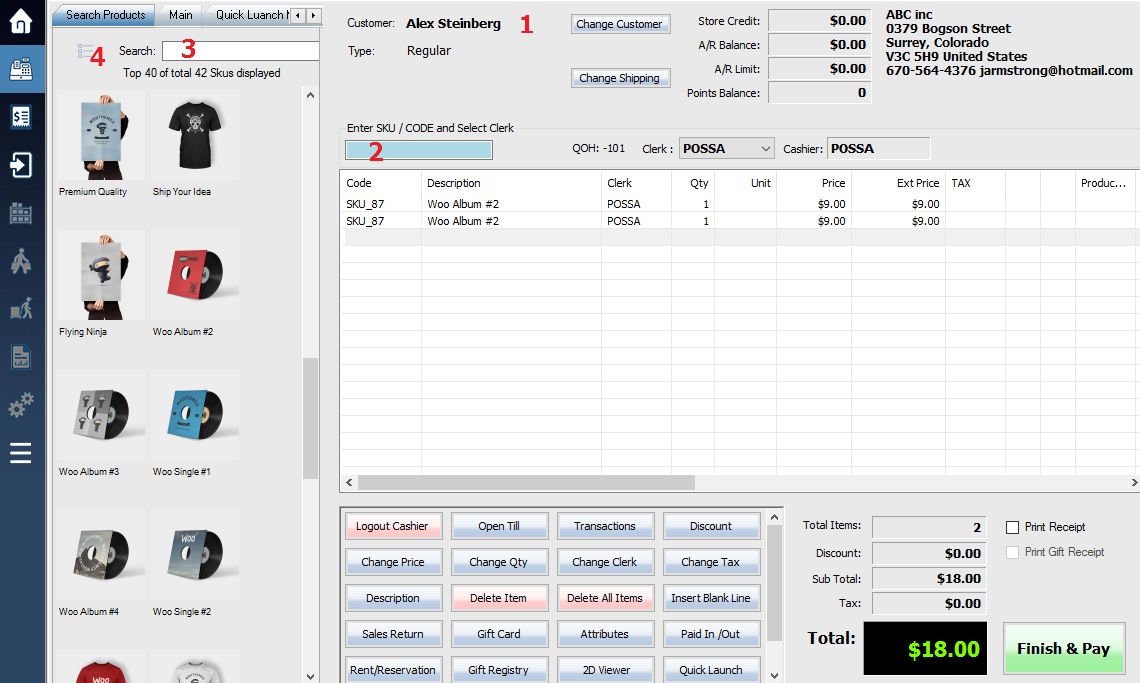
1. Upon selecting the desired customer, the transaction window will be revealed. Within this window, the customer’s name and information will be displayed in the Customer box.
2. Scan each item, or key in the Sku/Code of the product you wish to sell into the Sku/Code field and press Enter key to insert the item into the transaction.
3. If you do not know the Sku/Code of the product, type keywords in the search box. Click the image on the left side of the screen, this will add the item to the transaction item list.
4. You can also press F5 or ![]() button on the top-left of the screen to pop-up a detailed Sku search screen. Here you can view your inventory items, and locate the sku you wish to apply to the transaction by keying in a keyword into the Input Keywords field. Once you have located the Sku, either double click it, or highlight it and press Select Button on the top of the screen. The selected Sku will be inserted into the Item Code field. Press the Enter key to insert the item into the transaction.
button on the top-left of the screen to pop-up a detailed Sku search screen. Here you can view your inventory items, and locate the sku you wish to apply to the transaction by keying in a keyword into the Input Keywords field. Once you have located the Sku, either double click it, or highlight it and press Select Button on the top of the screen. The selected Sku will be inserted into the Item Code field. Press the Enter key to insert the item into the transaction.
More details here.
5. If the SKU has any variations (i.e. size, color, etc.) they will then be shown in a pop-up window. Double click the variation or select the variation and click the Select button.
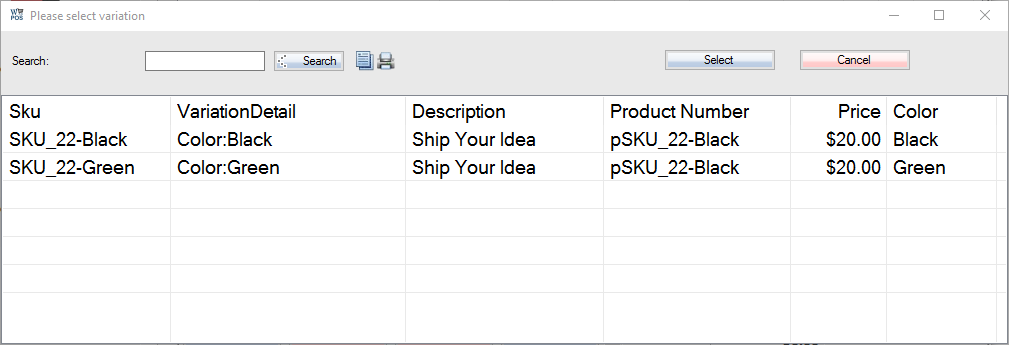
6. Repeat this process until you have entered in the selected items to sell.
Completing a Transaction
Once you have finished, select Finish & Pay on the bottom right corner of the screen. This will display a Process Payment window, here you will complete the sale.
![]()
1. In the Process Payment window choose the appropriate payment method and key in the amount, or press Insert key to insert the exact amount owing into the selected payment field.
– Some fields require a reference number or authorization number. You must enter in this number after inserting the payment into the selected payment field (for example if the customer was paying by cheque, you would enter the cheque number into the reference field).
2. Once the payment method has been entered into the preferred payment field, press the Enter key and then select the green Complete Transaction button to finish.
**You must press Enter in order to enable the Complete Transaction button.**
3. The Post Transaction Details window will be shown to inform you if any change is to be given to the customer, this will be displayed in the field at the top of the screen labeled Change due.
![]()
4. Press the blue Ok button at the bottom of this window to complete the sale. This will take you back to the home screen where you will be prompted to re-enter your username and password to continue on to another transaction.
You can speed up your sales process by using keyboard shortcuts or user defined quick launch buttons.