Grouping customers for AR reports:
1. Login to the system and access the customers menu.
2. Select a customer to create the A/R group for, then scroll the bottom customer details to the right until you see the A/R groups options.
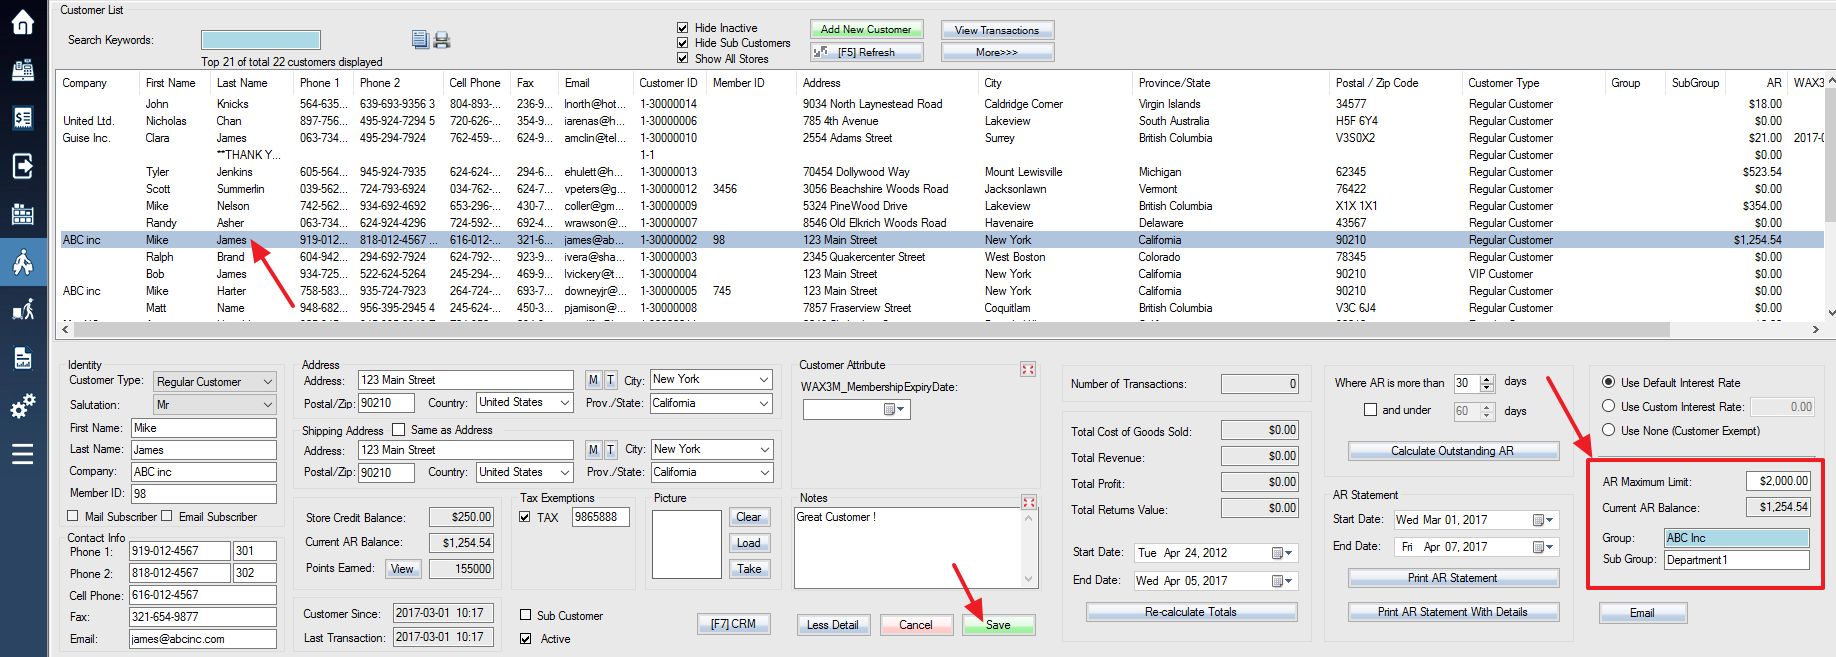
3. Enter the details of your group and sub-group names into the two group fields. Save your customer changes.
Select another customer and enter the same details to put them into the same group as before, or different details to create a new group or subgroup. Repeat this process for as many customers as you want.
![]()
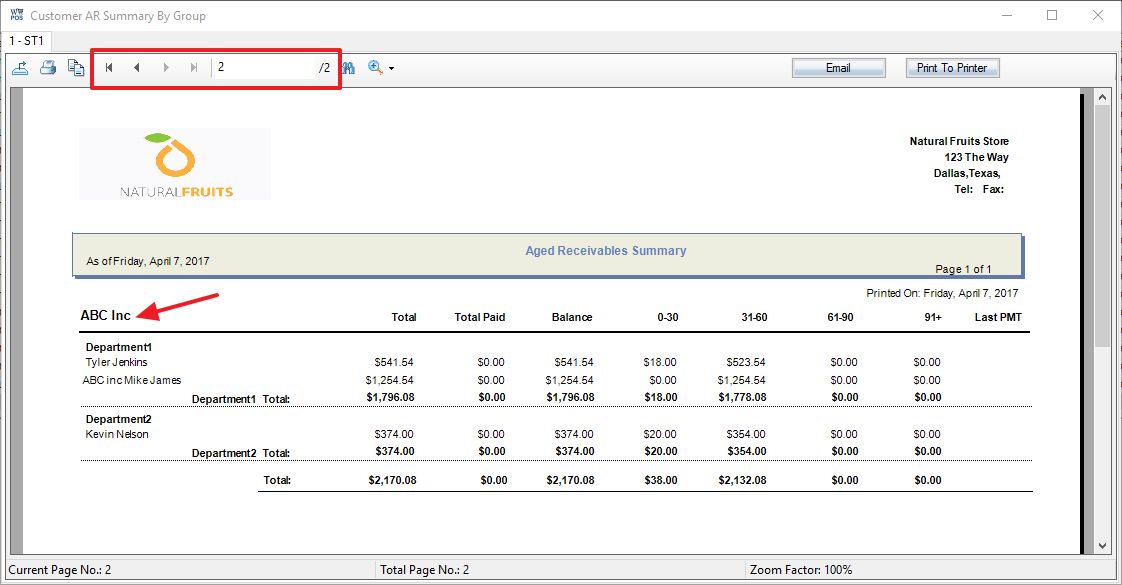
4. To view a report with A/R divided into your new groups, first access the Reports menu, locate the Customer AR Summary By Group report.
![]()
5. Click Preview Report to see this report. The first page will display all of your un-grouped customers who owe A/R. Select the small arrow near the top left corner of the screen to access the next page where your first customer A/R group will be displayed. The next page displays the customers divided and sorted into their groups and sub-groups that were previously created. Continue onto the third page to view other groups you also previously created.
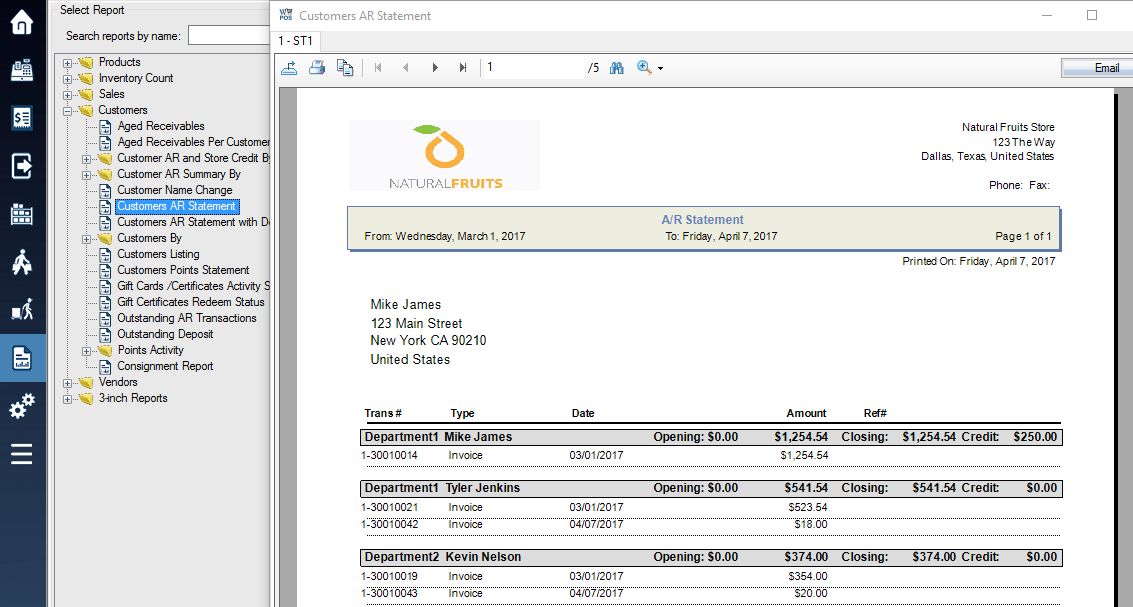
6. The AR statement has also been grouped.