
Tag SKU: A tag SKU is used when you wish an item to be automatically added to a sale every time a second item is purchased. You are free to remove the tagged item from a sale if you wish.
Example: A printer cable SKU is tagged in the info for a printer. Whenever a printer is sold, the cable will be added to the transaction, but if the customer does not wish to purchase a cable then it can be removed from the sale.
When you set a SKU as a tag SKU in another item’s attribute, then when the other item is added to a sale, the tag SKU will automatically be added as well.
1. First you will have to create the text attribute “Tag SKU” (without the quotations).
2. Now select the item with whom you want your second tagged item to be associated. Input the second item’s SKU into the Tag SKU field, which you have just created.
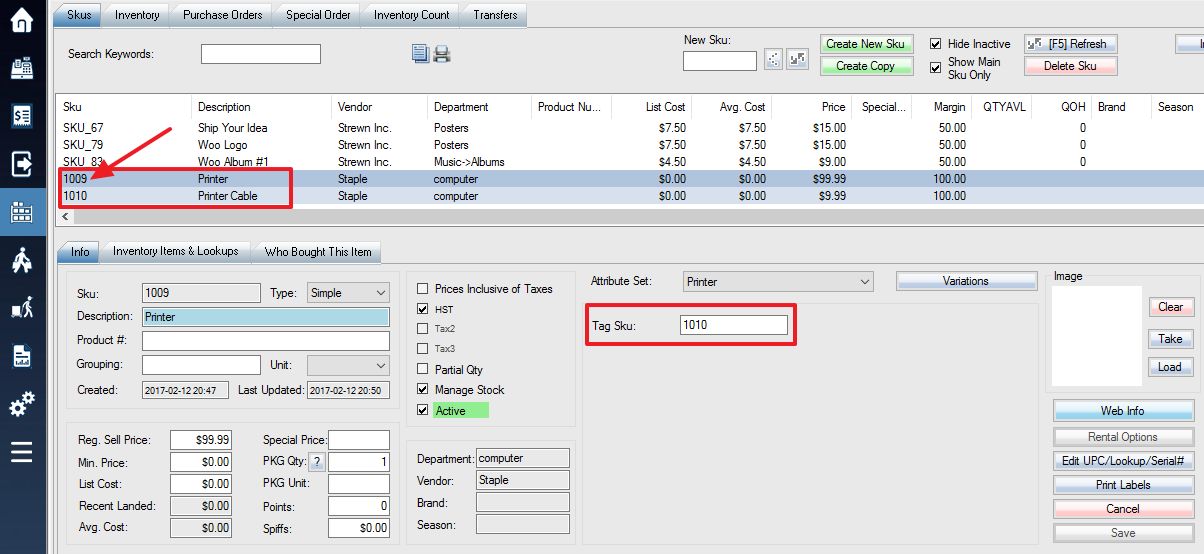
As an example, tagged SKU 1010 (a printer cable) in the information for SKU 1009 (a printer). Now whenever the printer item is added to a sale, the printer cable will also be automatically added. If the printer cable is added to a sale by itself, the printer will NOT be automatically added unless it is also tagged in the cable’s information settings. If the customer does not want to purchase the cable, it can be removed from the sale window before completing the transaction.