
New vendors can be added from the Vendors window. First, Log into SooPOS and then access the Vendors menu
1. From the vendor list, select the Add New Vendor button to bring up the add new vendor dialog.
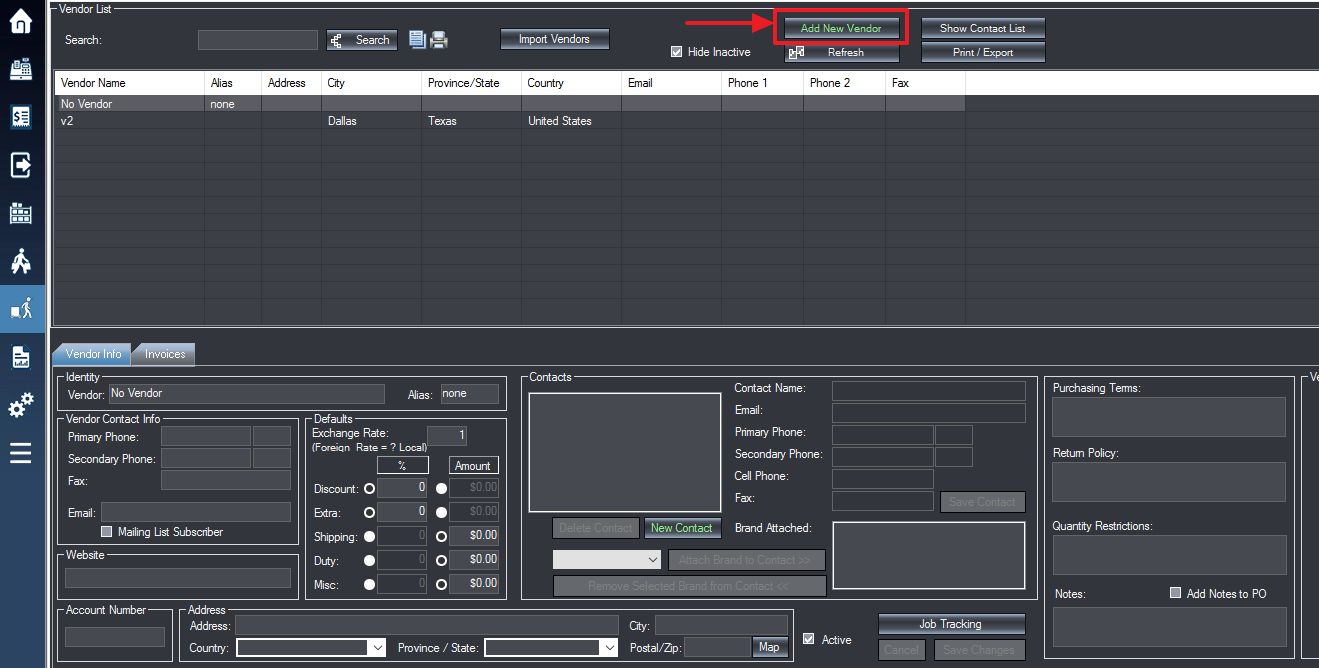
2. You will see a window with boxes labeled as Identity, Vendor Contact Info, Defaults, Website, Account Number, Address, and Contacts. Within these boxes, you will key in the required information into the enabled fields.
Label 1. Identity: Enter the vendor’s name and alias (the alias will be a shortened version of the vendor name)
![]()
Label 2. Vendor Contact Info: Key in the contact info for the vendor. If the vendor wishes to be a mailing list subscriber, check the box labeled as Mailing List Subscriber.
![]()
Label 3.Defaults: In the defaults box you can set up the current exchange rate, as well as any extra charges or discounts for this vendor. To adjust any of these enter in a percent amount into the percent column or an amount into the amount column by selecting the circle located next to either choice.
![]()
**When the exchange is different than the default currency for vendors, then the list cost of the SKU associated with this vendor will be highlighted green in the SKU-list.**

**When a discount is applied for the vendor, then the list cost of the SKU associated with this vendor will be highlighted yellow in the SKU-list**
Label 4. Account Number: Enter the vendor’s account number on the bottom-left corner.
Label 5. Address: Enter the vendor’s address. Press the Map button to display a map of the location entered.
Label 6. Contacts: You can enter the name and information of a contact person for the selected vendor by filling in the information in these fields. You can also go back at a later time to change or add new contacts as required.
![]()
3. Enter Purchasing Terms, Return Policy, and Quantity Restrictions if needed.
In the Notes box you can type in notes about the vendor. If you check off Add Notes to PO checkbox, the notes will appear on the purchase order screen as well.
In the Attributes box, you can key in values for attributes that you have created in the setup menu.
![]()
4. Once you have finished entering in your vendor’s data, select the Save Changes button to save your information.
![]()