
1. Click Labels from the home screen.
![]()
2. Overview of Label Generator:
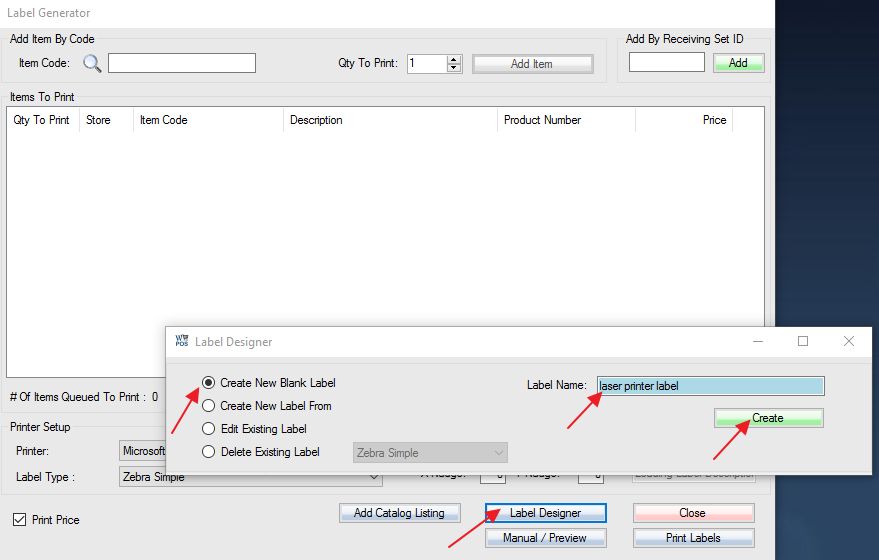
Step 1: Select the Label Designer option.
Step 2: In the window that appears, ensure the Create New Blank Label option is selected.
Step 3: Specify a desired name for your label.
Step 4: Select Create to proceed and edit the label.
This will bring up the Label Designer window which is where you will design your new label. The interface on this screen is divided into two main sections:
![]()
![]()
3. The buttons in the top left corner give you several options for adding items to your label.

– Adds a picture from your computer to the label.
– Adds a line of text which can be customized to display various fields (SKU, code, brand, vendor, etc)
– Adds a barcode to the label. You can change the size and type of barcode depending on label size.
– Adds a black line. size and angle can be customized in the settings.
– Sends the currently selected object to the back of the canvas, behind other objects.
– Export a copy of your current label to a file.
– Import a previously saved design from a file.
– Deletes the selected object.
– Saves your label.
4. The right side menu allows you to make changes to the currently selected object. The displayed options will change depending on which type of objects you have selected.
Menu with no objects (click blank area) selected.
Menu with an object selected.
Creating a label is simply a matter of setting the correct label size (clicking on a blank space, using the labelSize_Height and LabelSize_Width fields in the right side menu, measurement in inches), adding items to your label by clicking the menu button, clicking on a blank space on the label to place the item, and then customizing those items by selecting them and using the right side menu.
A completed label viewed in the label designer (left) and as a preview for a specific item (right). Note how two fields are automatically filled in with the item’s information.
Remember that when saving your label, the bar code cannot be smaller than 10mil or it might not be able to scan properly.
Related articles:
Adding and Printing Product Images on Labels
Creating and Printing Labels for a Laser Printer